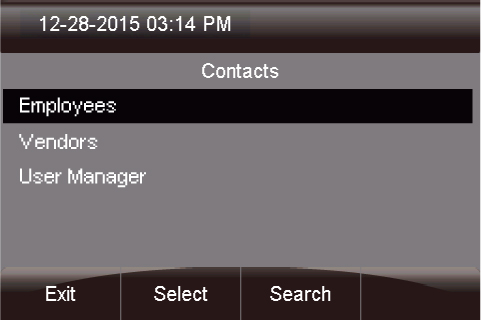
Viewing Contact Groups
- Pressing the Contacts button will bring up a
list of all
contact groups created inside the Contact
Manager
module.

- From here you can see there are 3 groups:
- Employees- In this example, this is an
"Internal
Group".
- Vendors- In this example, this is an
"External Group".
- User Manager- This is a default group
that provides all
users and cannot be deleted or modified.
Dialing Contacts
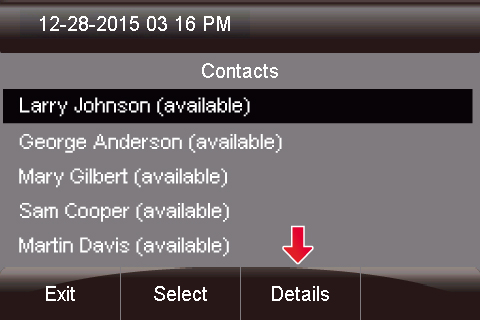
- You can press the Selectbutton to view the
users in that
group. In this example, we are selecting "Employees."

- Now, use the up and down arrows to highlight the user you are
looking for.
Then, press Select.

- From here you will see all the numbers set for this user.
Highlight the one
you want to call and press Dial to place the
call.

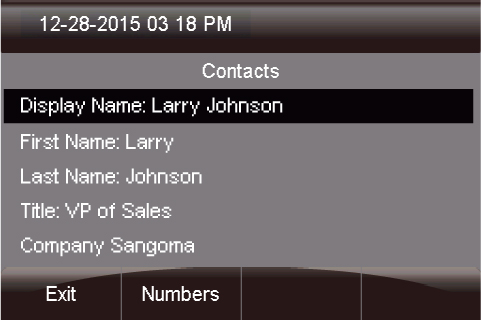
- You can also press the Details button to
view more details
on a user.
- You can now view information like his or her title, company
and email
address.
Searching For Users
- From the home page of the Contacts application, press the
Searchbutton.
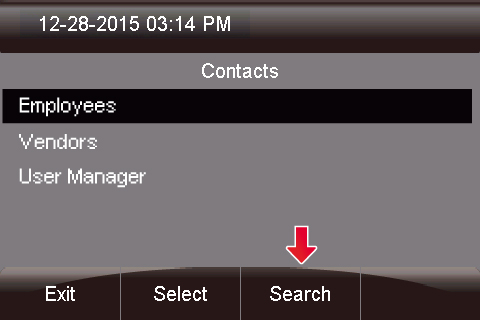
- Next, enter in your search criteria and press Done

You'll then see all of the users that
start with your search criteria.

- Complete the call or view details similar to the example
above.